Stop Motion Video
Learning technology is important especially for new teachers. Today our classrooms are created with diverse learners. To reach all of the learners in a class, teachers need to present learning content in many ways. This week in Tech we were introduced to a couple of concepts that would be very useful for us to use in the classroom. One concept we covered is creating stop-motion video using Zing Studio app, this was a fun way to create.
My group created a 7 second clip using Lego. I have to give credit to my group because we made a small error and thought the app would up load the the pictures but actually you have to take the pictures through the app in order to use the app to make the stop-motion video. Troubleshooting: because we took the pictures without using the app, Zac in our group decided to use iMovie and spent some time editing, he did an amazing job!
Graphic Design Using Canva

This is one of my favourite graphic platforms to use. I have branched out and tried Wix and Prezi but I always go back to Canva. I find it really easy to work with. I have had the opportunity to create useful tools for the classroom. Canva is great tool to use when wanting to include graphics within your projects.
Pros and Cons of Canva
Pros
- There are many different templates ready to use, such as:
- Brochures
- Presentation with video and audio recording options
- Infographics
- Social media options
- Posters
- Whiteboard
- and many more…
- Canva can be free depending on what you choose
- Sharing presentations and downloading is not a complicated process
Cons
- Some of the really nice templates are not free
- Canva pictures are limited (I upload my own)
- The video presentation option can be limited in the recording options
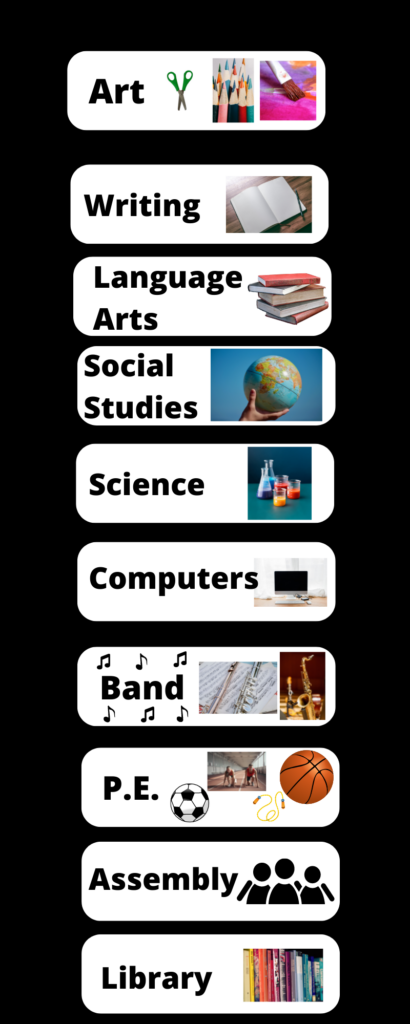
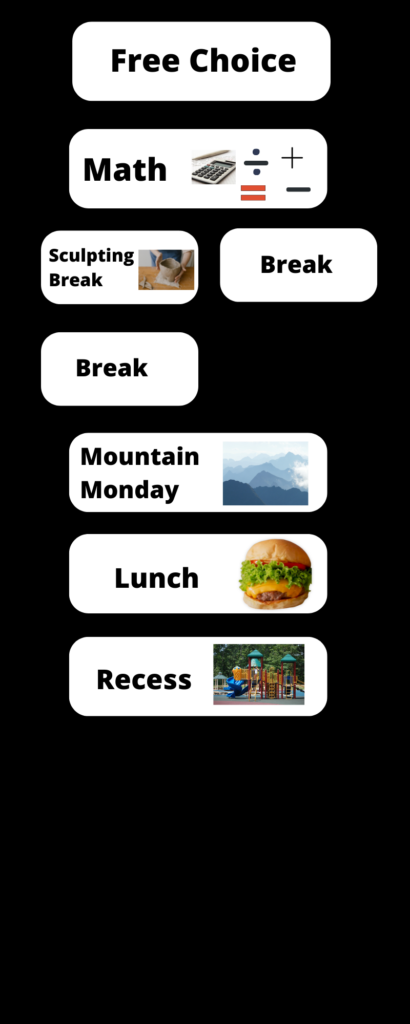
I really enjoy using Canva, one of my personal cons is that I can spend hours designing and changing my creations, which isn’t always great when considering time management. The following are an example of visual schedule cards that I made. When searching for visual schedule cards I found most options were centered around primary age groups. I wanted cards that were for an intermediate class. Another option in creating these is using your own pictures from the class this would make the cards very relatable for students. These cards are often placed in the classroom, in an area where all students can see, this helps students know what is next in the day.
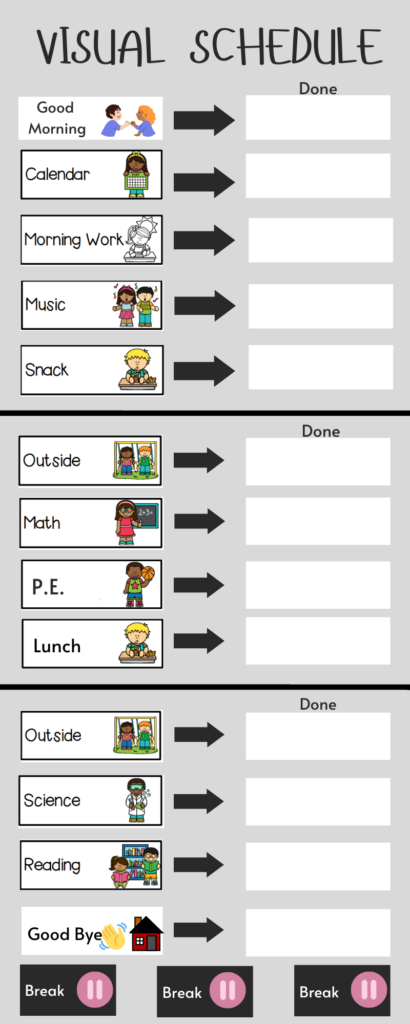
This is an image of a personal schedule I created. This would be designed for a particular student who needs a visual of their daily schedule. This can be attached to the students desk or the student can carry it with them if they need to. How this works is that the images on the right are attached by velcro and once a student has completed the task on the schedule they move it over to the “Done” section, where they can velcro the card there.

Creating with Canva can be endless, it provides many avenues for creation. I often have difficulties with different tech applications but using Canva has been very accessible and enjoyable platform to use.
Leave a Reply
You must be logged in to post a comment.